Adjustments – A Guide for Yoga Teachers.
Your main job as a teacher is to allow your students to express themselves fully in each yoga pose. Your priority is to keep them safe. Once you know they are moving safely and breathing smoothly you can then look at deepening their experience of the pose, either helping them find greater stability, greater ease, more strength or stretching action, or maybe assisting them to go to a new place in the pose, helping them increase their flexility or helping them into an advanced yoga pose.
Initially as you hone your skills as a teacher and as you get to know your students your main objective is to teach them classic yoga poses done with optimal alignment, grace and ease. As you develop as a teacher and your students develop along with you, you will seek to take them deeper into the poses and refine their alignment.
Keep your language simple and your instructions specific: Step wider. Stretch your arm up. Move your knee back. Spread your fingers wide. Repeating the same instruction again and again in different poses is really helpful for students, for example a student with a lot of tension in their shoulders will repeat the action of hunching their shoulders towards their ears. You may notice this first in Tad Asana, a gentle touch ‘soften your shoulders’ should encourage the shoulders to relax. You might repeat this in Warrior. You might adjust their shoulders in Savasansa. If you treat a newcomer to this attention and freedom they will forever more be grateful to you!
Remember best alignment for your student is the optimal blueprint for their body in the pose. Tell them they are the ultimate guide to what feels right for them, encourage feedback, ‘how does that feel?’ “Is this ok?’ We are not looking for perfection. Priority is for your students to find stability and comfort in each pose. ‘Find Tad Asana in the pose’. ‘Breathe’.
Using adjustments in a class.
Before you teach any class set your intention for the class and let your class know what to expect. Will it be a flow-based practice or a more alignment-based workshop-style class? Will you teach a peak pose or teach a particular alignment instruction for your students to explore? Will you be touching them?
Ask about injuries. If a student has an injury don’t touch them. Let them modify as they need to for their own comfort.
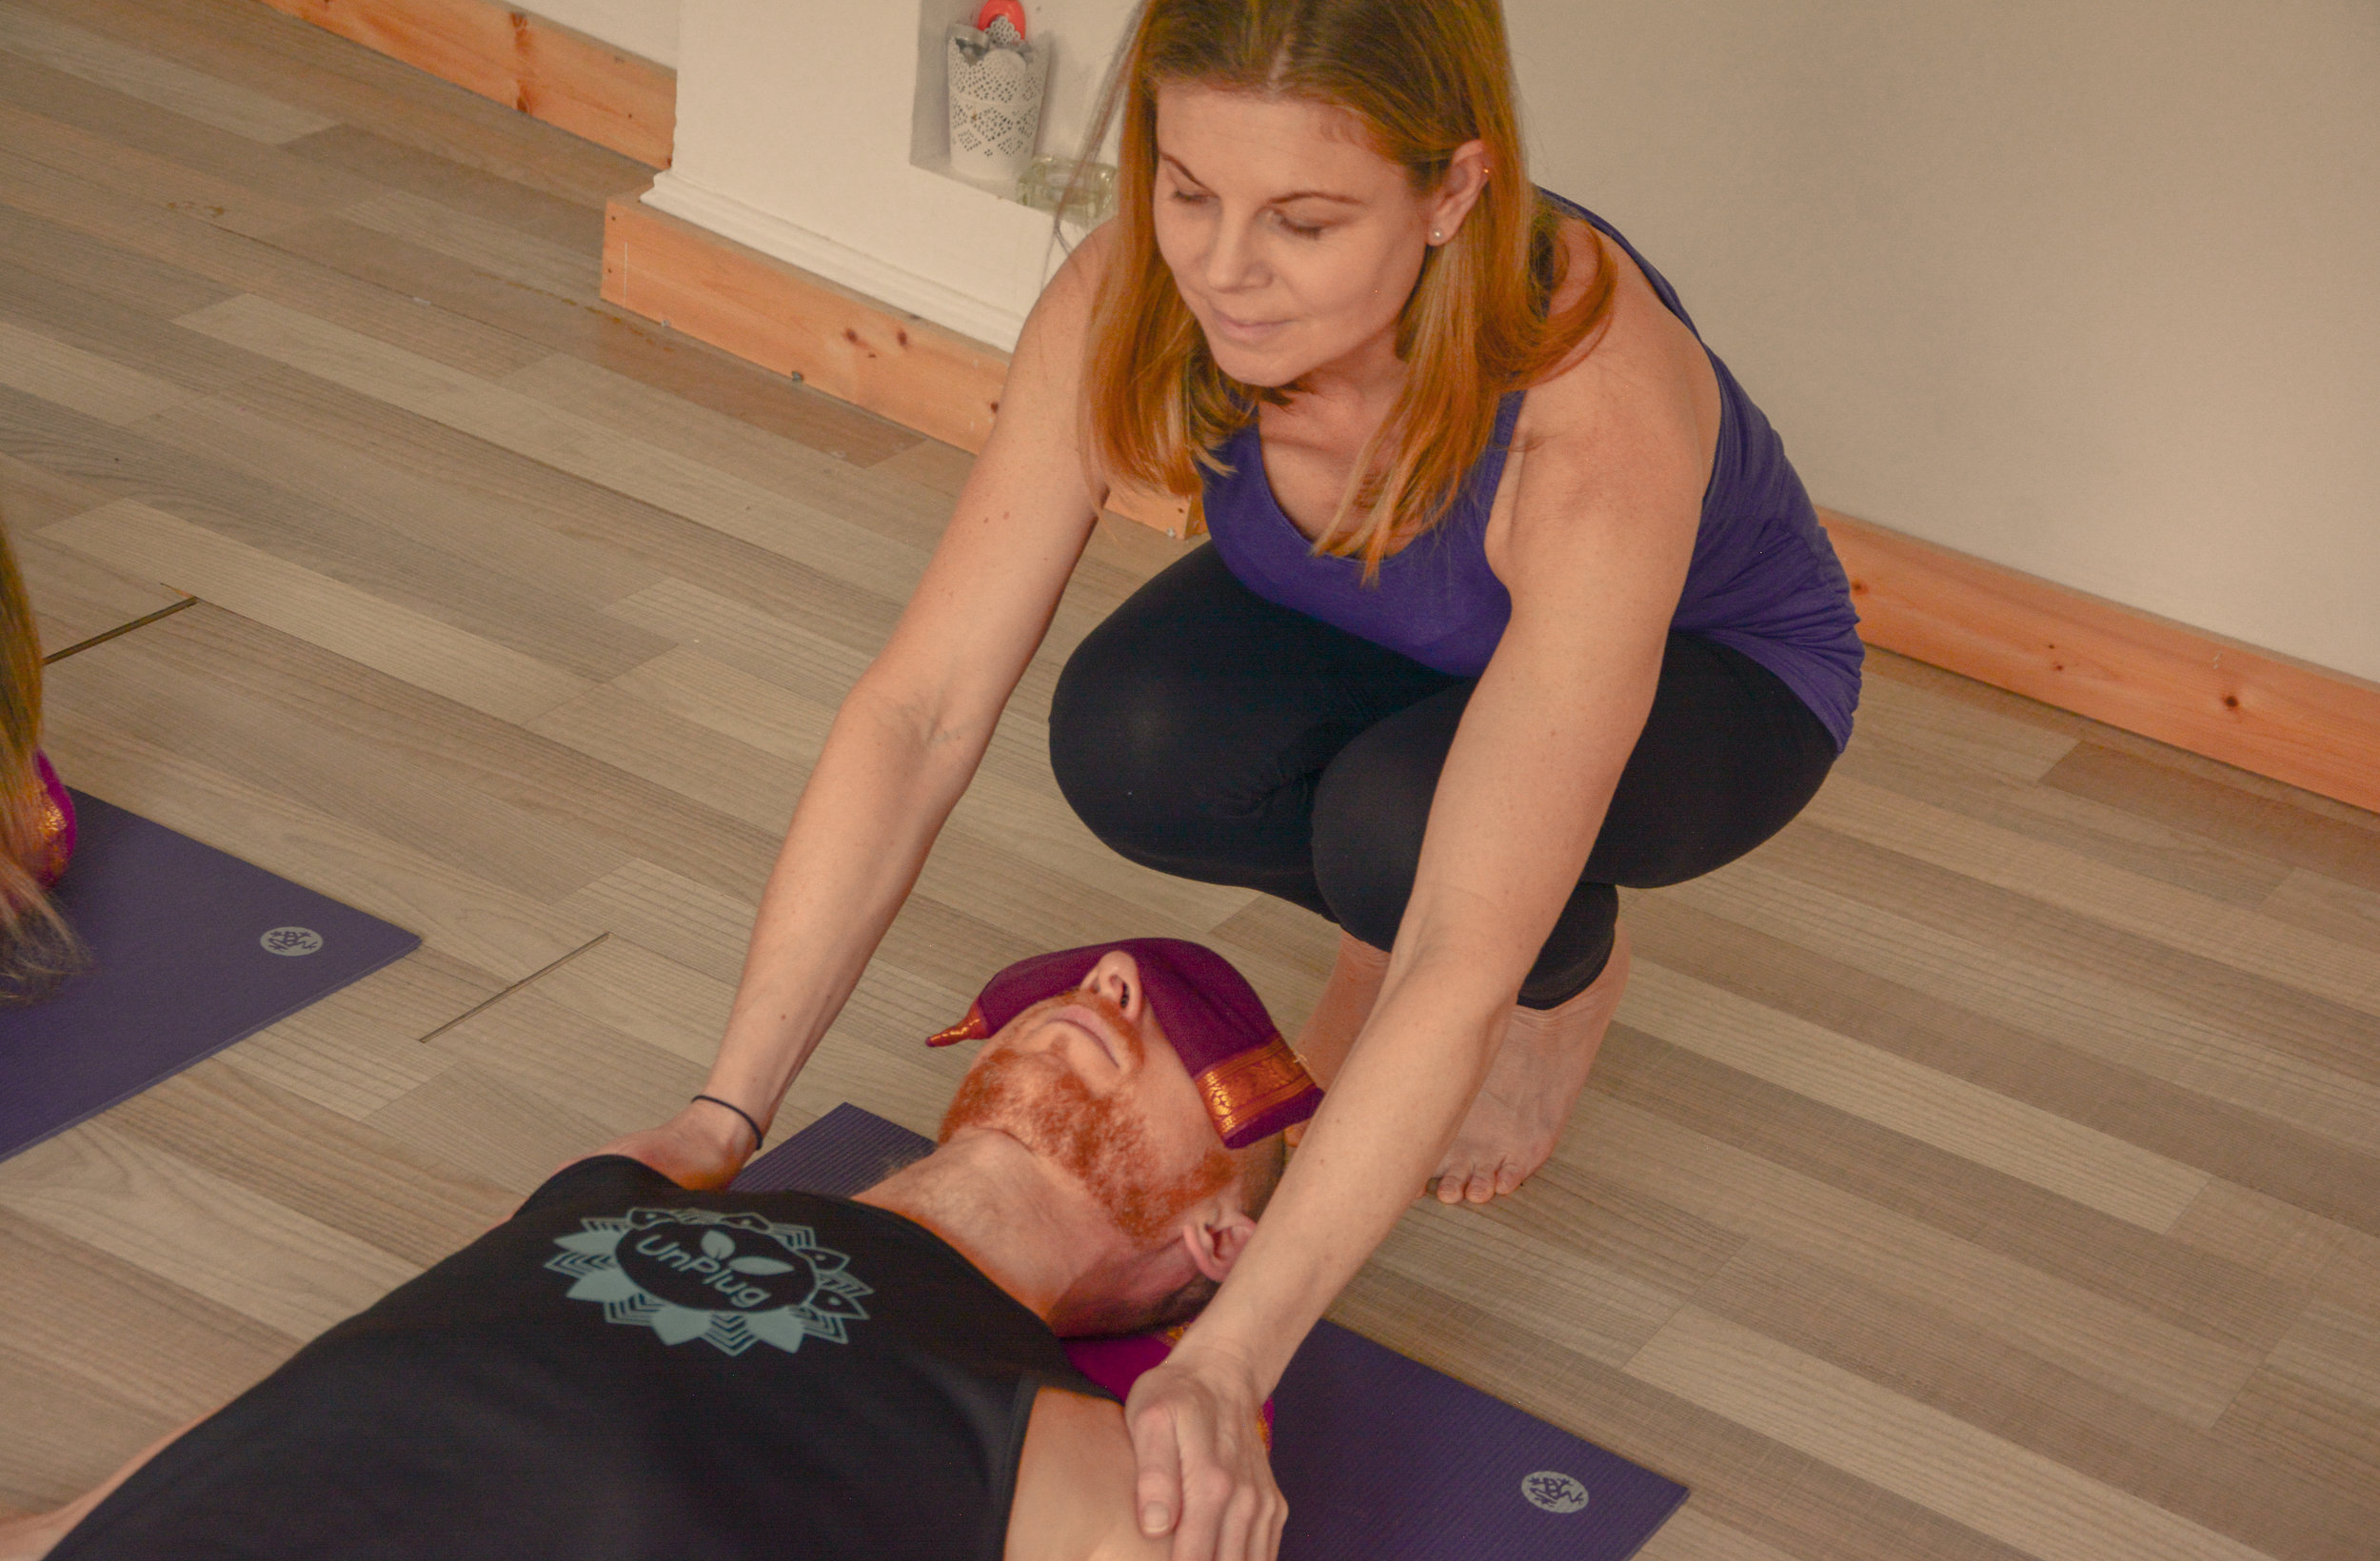
If you will be adjusting your students, let them know. If it’s a gentle touch you can let them know as a group. For example as you walk around the class and observe them in Tad Asana (or another standing pose), ‘while you are in Tad Asana I might place my hands on your shoulders to encourage you to relax them’. ‘While you are in Savasana I might gently press down on your shoulders to encourage them to relax towards the floor’.
When it comes to specific adjustments for individual students move closer and speak in a quieter voice directly to them. Ask their permission, especially if you intend using a strong touch. Let them know what is required of them. If you require an action from them tell them exactly what is is you want them to do, for example, in Trikonasana, ‘press into my hand’ as you place your hand on theirs to encourage them to open the chest.’ In cat/cow place your hand on their back and say “round your back and move my hand towards the ceiling”. If you intend doing the ‘work’ for them, let them know. For example in Savansa tell them “i”m going to press down on your shoulders, don’t help me, don’t resist me, just release.” If you are pressing on their sacrum in down dog tell them ‘I’m pressing back to help ground you and to take the weight off your arms.’
If you are manually moving them and you want them to just go with you tell them what you are doing, for example, in Warrior II as you move their knee back over in line with their ankle you could say ‘keep your knee above your ankle’ or address the group ‘move your knee back toward the person behind you.”
Before you even think about adjusting, observe.
As you teach you will be observing the alignment of your students. Notice the ones that need help the most. Bear in mind many students, especially the brand new beginners might just prefer to be left alone! Some students view corrections and adjustments as criticism and don’t like to be singled out in a class. Choose your victims wisely!
When you are considering a student’s alignment look at their outer form, ie. the overall shape of their body in the pose. You may notice their stance is too narrow, they are leaning too far forward or back, their neck looks uncomfortable or their arms are off centre. Verbalise and demonstrate instructions to correct, first to the group, then to the individual, finally touching the student if necessary.
Next look at the details. Start with the foundation of the pose, the placement of the feet (all four corners grounded, arches lifted) in standing poses, the placement of the hands in downward facing dog (fingers spread wide, crease of wrist in line with top of mat, ground down into base of index finger and thumb), tabletop and arm balancing poses. Observe from the core out, eg. correct placement of shoulders before you seek to correct the placement of the hand. As above, instruct verbally first, use voice and demonstration before touch.
Then review the outer form again seeking your student’s full expression of the pose. Use non-verbal queues from your student to gauge their experience in the pose, their facial expression and their breath. ‘Smile’. ‘Breathe’. ‘Stretch’.
In summary: Steps and stages of adjusting
1. Verbal to the group.
2. Observe the most obvious – outer form, optimal alignment, foundation, then detail.
3. Explicit instruction to the group, then demonstrate.
4. Explicit instruction, demonstration, adjustment to an individual in a quiet voice standing close to them. Keep it brief, don’t go on and on and if they’re not ‘getting it’ don’t worry. They will with time. You can’t take too much time away from the rest of the group and it can be embarrassing for a student if they just can’t follow your instruction, especially if they are new. I sometimes quietly say ‘well done’ as I move off, even if they haven’t really assimilated the instruction!
5. Touching an individual – the different kinds of gentle touch.
5.1 Standing near them to offer support to them. ‘I’m coming close to you to be like your wall. You can lean into me and use me for balance or just know I’m here if you need me’. (Helpful for new students transitioning from Trikonasana to half moon pose.)
5.2 Stand close and stabilise them. Lean into them and use a firm hand to stabilise.
5.3 Use a gentle touch to encourage better alignment but have them move into you – their action. Place a foot or a hand near them and ask them to move to you. eg. If they need a wider stance step your foot to the place on the mat and ask them to step closer to you. Place your hand up palm facing their hand and ask them to press into you.
5.4 Use a gentle touch to encourage softening eg. gentle touch on top of shoulders say ‘soften your shoulders down away from your ears’.
5.5 Use a gentle touch to encourage strengthening, let them use their strength to move towards you. e.g.. gently place hand just over crown of head and say ‘lengthen into my hand’. Place palm to palm in trikonasana and say ‘press into my hand to push me away.” Place hands on inner upper arms in dog, dolphin, prep for tripod headstand to encourage them to keep hugging into the midline.
5.6 Use a gentle touch to encourage better alignment; you move them. eg. lightly press the knee back over ankle in warrior II. Take the top wrist in Trikonasana, parsvokanasa and lightly move it to lengthen the arm. Manually rotate top humorous or hand to encourage an outward rotation of arm bones. Press your hand into the upper back to encourage good shoulder alignment.
5.7 Savansana, release shoulders. Note that gentle, firm or strong could be appropriate here (most will love strong!). Ask your student. ‘Does this feel ok?’ ‘Will I do more?’
6. Touching an individual – the different kinds of firm touch
6.1 The sacrum. Press down with the flat of your hand in forward fold, wide leg forward fold to stabilise.
6.2 Grounding hips for seated poses. Press down firmly on tops of thigh bones.
6.3 Ground the sacrum in down dog. Flat of your hand flat on the bone. ‘I’m grounding your body weight back to your heels for you, you allow yourself to drop back and lengthen your arms/broaden your shoulders/rotate your arms bones outwards/hang your neck. *this can become a strong touch ‘Does this feel ok? Will I do more?’.
7. Touching an individual – a strong touch. Hands broad and firm. Use your chest and body. Caution: not for everyone, only your sturdiest, most complaint friends!
7.1 Pushing deeper into seated forward folds
7. 2 Supporting students in inversions, being like a wall, holding them for a breath or two in the pose.
7.3 Press firmly into a body part and ask the student to resist you eg. back leg in long lunge, floating leg in Ardha Chandrasana
7.4 Lifting a leg up for them in headstand.
7.5 Too many partner yoga/acro yoga options to mention!
Examples of poses for new teachers to learn manual adjustments:
Ado Mukha Svanasana – rotating arms, pressing back and down through the hips.
Uktasana – adjusting the distance between the knees
Parsvokanasana – stabilizing pose, observing and refining knee alignment, lengenthing top arm.
Trikonasana – stabilizing pose, opening chest.
Ardha chandrasana – stabilizing pose.
Bhujangasana / Salabhasana – adjusting shoulders back while heart melts forward
Janu Sirsanana – lengthening torso over leg
Sirasana – supporting upper back with knee; stabilising pose
Sarvangasana – lifting entire body to adjust arms and shoulders
Setu Bhandha Sarvangasana – lifting chest, grounding shoulders
Urdhva Dhanurasana – stabilising pose, adjusting upper back
Ado Mukha Vrkasasna – lifting and supporting student at a wall; spotting in middle of room
Remember: if in doubt don’t do it! Go easy. Priority is safety and after that have fun!
Adjusting is a little like life: if it ain't broke don't fix it! Choose your moments of intervention wisely. If you've nothing good to say about something, don't say anything at all. Above all do no harm. Be careful where you stick you nose in! It's not about the destination, it's about enjoying the journey!
Sylvia teaches live online yoga twice a week and monthly online workshops. You can find out more on the events and workshops page or sign up for her newsletter on her home page. Pre-recorded classes are available to you any time, you purchase once and own forever. If you’re new to Sylvia or back to yoga after a break we suggest Hatha Yoga to start. Bundles include the Zen Collection, a variety of classes for every mood, and the Daily Collection, five half-hour daily practices. Please inquire about virtual Mindfulness in the workplace. We remain very hopeful for a return to outdoor yoga in Spring Summer ’21. Join us!

